September 28, 2011

Homemade Flavor Extracts

This post is a shout-out for all of you out there who always seem to have some over-ripe fruit hanging around. You know who you are.

You have a few options.

  1. Make puree's. They keep fairly well in the freezer and can be added to smoothies, ice creams, etc.
  2. Dehydrate them. This only works if you have a dehydrator, and one can only take so much dehydrated fruit, but this is a good option every once and a while.
  3. Make flavor extracts. This is my favorite. Why? Because an extract can be used to make delicious candies, chocolates, and way more without having to mess much with an existing recipe. 
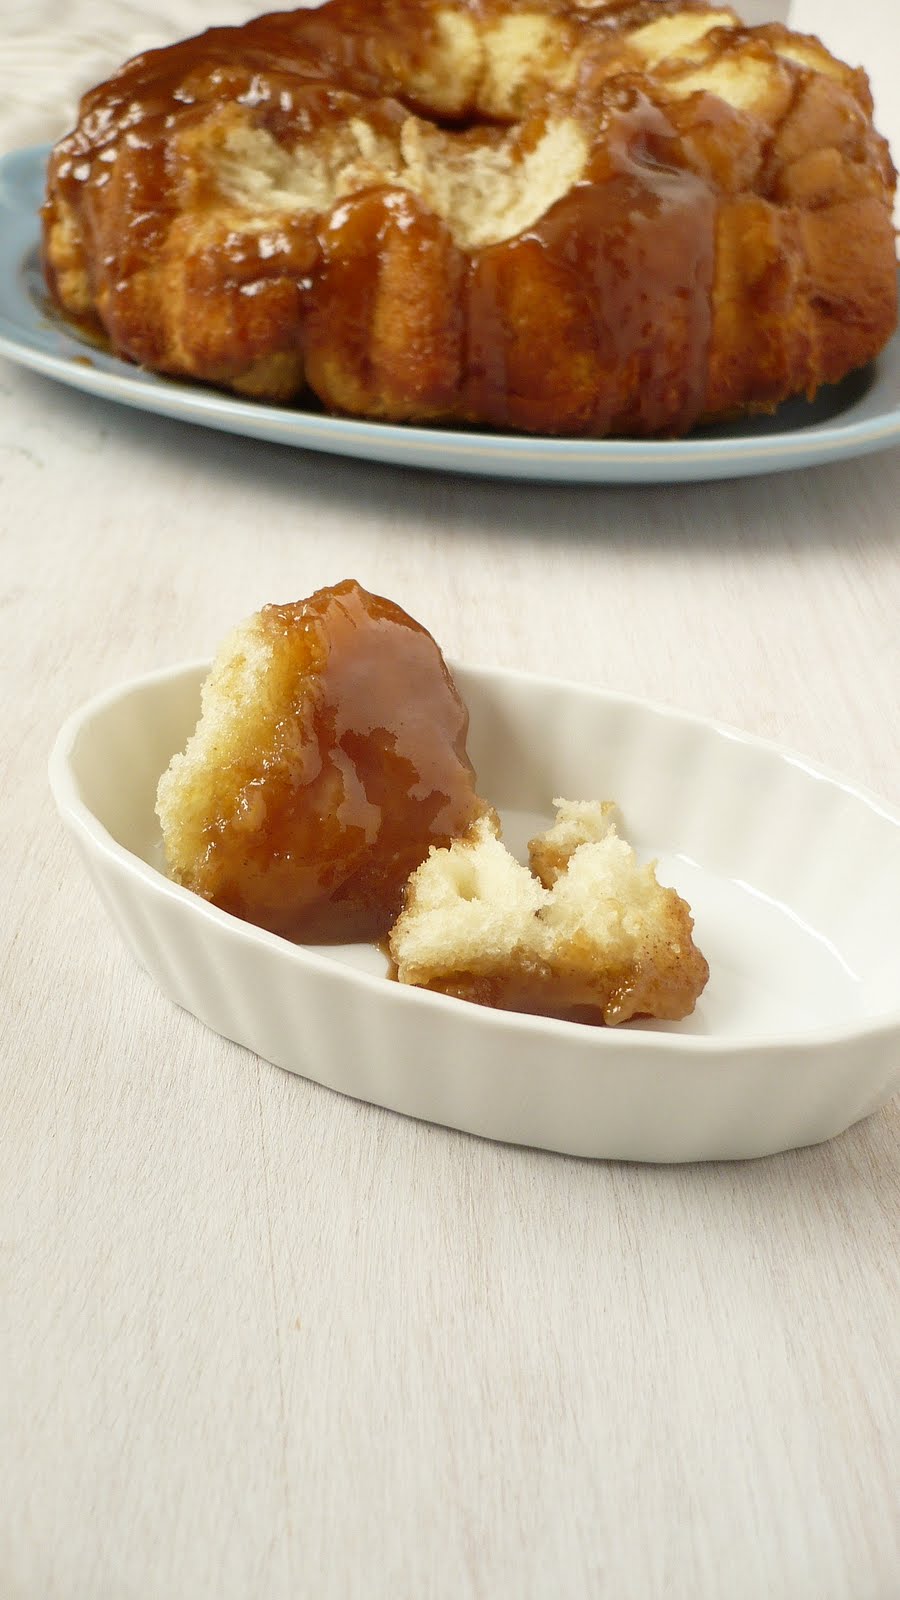
I apologize for the bad picture.
The process is super simple, and you only need two ingredients.
  1. Ripe fruit
  2. Vodka
When selecting a vodka, shoot for the middle of the road. You don't need a great vodka (it's not worth it), but you don't want the cheapest vodka you can find, either, because some off flavors can get in.

All you need to do is cut some of the fruit up nice and small, add it to a small bottle (to 1/4 full or so, less for citrus), and pour in some vodka. It takes a few weeks to get good flavors, but you can shove them into the back of your pantry and forget about it. For citrus fruits, use the zest. For others, try to figure out what the most flavorful part of the fruit is. For apples, the peel makes a great extract, but for mangoes, the flesh is best.

Eventually these extracts will lose their alcohol smell and taste, and will blossom into delicious flavors. I will warn you, however, that this can get a bit addicting. A bit.

What do you usually do with fruit that's nearing its end?
Share on Tumblr submit to reddit

September 25, 2011

Know your cookies: fat

I'll start by telling you all that this week's cookie experiment was just as successful as last week's, and a hundred times tastier. This time, I varied the fat, with somewhat surprising results. I stuck the liquid level at a constant (somewhat - it went over in the upper levels of fat, just because of how much water was in the butter) 50%.

I totally love doing these recipe development posts, as I hope you all do. I started this trial by making cookies with no fat, 25% (based on flour weight), 50%, 75%, and 100% fat weight. This was calculated by subtracting the weight of the water from the weight of the butter to get the weight of the fat.

vvbvgfcv. (My dog's contribution to the post)


The real shocker came in the 0% fat cookies. They were amazingly, surprisingly delicious. They came out super gooey. They were also fairly chewy, and a bit coarse. But in no way were they horrible. I would definitely make them again. (Oh, and full disclosure, they have small amounts of fat from the egg yolk and milk, but I don't count that, compared to the possible 4+ ounces of butter)

The 25% cookies were actually worse. They were chewy,  but rather tough.

The 50% cookies ended up fairly chewy and fairly soft, and decidedly richer than the previous two.

The 75% cookies were soft, but still had some height. They melted in the mouth and were a bit richer than the 50%.

The 100% cookies were very soft (falling apart) and flattened in the oven. They also melted in the mouth, and were very rich. They took on a caramel flavor which the previous cookies didn't have.

And that was this week's experiment in cookie recipe development. Do with it what you will. I suggest somewhere between 50% and 100%, keeping in mind that the higher the percentage, the richer the cookie and the more spread you get.

Oh, and here's the recipe for the butter-free cookies. Mix together the dry ingredients, then add the wet ingredients and mix to combine. Bake at 350 for about 12 minutes.

Ingredients:

  • 4 ounces AP flour
  • 4 ounces brown sugar
  • 1/2 teaspoon salt
  • 1 teaspoon baking powder
  • 1 egg
  • .6 ounces milk
  • 1 teaspoon vanilla

What characteristics do you enjoy in a cookie?
Share on Tumblr submit to reddit

September 23, 2011

Earl Grey Peach Cake

Going back to school has really brought some more inspiration into my life. Being around tons of great recipes and products like pepper jelly and cayenne chocolates, chocolate stout cakes, and strawberry yogurt mousse tortes, has given me tons of great recipe ideas. But sadly, school has also sapped all of the baking time out of my life.

Oh peaches.
So I've decided to bottle it all up until the weekends, when I can bake and write recipes and blog posts for the week ahead. I settled on this plan Tuesday and have been looking forward to baking this cake all week.

The results were rather messy, but the taste was all there.

Ingredients:
  • 8 ounces flour (cake or AP)
  • 1/2 teaspoon salt
  • 12 ounces eggs
  • 11 ounces sugar
  • 8 ounces Earl Grey tea
  • 1 teaspoon vanilla
  • 8 ounces butter, softened
  • 2 tablespoon Earl Grey reduction (To make, brew a cup of Earl Grey, add about 1/4 cup of sugar, and simmer until most of the water is gone.)
  • 1 egg (or 2 tablespoons pasteurized egg)
  • ~7 cups powdered sugar
  • pinch salt
  • 2 medium peaches, chopped and dried

Directions:

  1. Preheat the oven to 350 degrees F. Prepare two 8 inch round pans with flour and parchment.
  2. Whisk together the flour and salt.
  3. In a mixer, beat the eggs and sugar for about 5 minutes on medium speed, until thick and pale.
  4. Mix the 8 oz of Earl Grey with the vanilla. Alternately mix in the flour mixture and the liquids.
  5. Bake for about 15 minutes, or until a toothpick comes out clean. Cool to room temperature.
  6. Beat together the butter, reduction, egg, and salt, adding powdered sugar to desired consistency.
  7. Frost the cake, filling and topping it with peaches.
Share on Tumblr submit to reddit

September 20, 2011

Chocolate Rum Shot Glasses

Sometimes, in the kitchen, I don't think. I just get an idea and go with it. I don't stop to think "Hey, wait a minute, there's a reason they make chocolate molds for shot glasses!" I just try to make them in regular shot glasses. And then they don't come unmolded.

But I urge you not to do the same. Make these, for sure. But get some molds. Or use some sort of nonstick spray or something. But don't just pour chocolate into shot glasses (what was I thinking?).

For each shot glass, you will need:
  • .5 ounce chocolate, tempered
  • .5 oz chocolate, melted
  • .5 oz heavy cream
  • 1/4 teaspoon rum
Here's a little article on chocolate.


To prepare the filling, whisk together the chocolate, cream, and rum. Fill the shot glasses and enjoy. Responsibly (although I can't imagine how many of these it would take a person to get intoxicated).
Share on Tumblr submit to reddit

September 19, 2011

Tarts and Hamsters

Today, among piles of cookies, there sits a tart. It is not, however, a tart that you all want a recipe for. It was rather a disaster (the black pepper in the crust isn't as subtle as I would like (or subtle at all, for that matter)). But, such is life. This past week has been a bit crazy (and I still have tons of cookies from the last post), but I promise another post is coming soon. An actual one, with useful information and all. So, stay tuned. To hold you over, here is a gif of a hamster.

Share on Tumblr submit to reddit

September 17, 2011

Know your cookies: moisture

I know I've mentioned it in a few posts, but I'm glad to be done with cakes for a little while. Really, there's only so much cake a person can eat, and only so many cake-related posts a person can write before he starts to go a bit loopy.

I can now testify that the same thing happens with cookies. After making four batches of cookies today, with more planned soon, I'm seeing them when I close my eyes. But it was all in the name of science (or at least pseudo-science), and because of it I now know a bit more about the role of moisture in cookies.

Each batch was made by using a standard cookie recipe and changing the amount of liquid in the recipe (counting the water in the eggs and butter) based on the flour weight. So if the cookie had 10 ounces of flour in it, the water weight for a cookie with 50% water would be 5 ounces.


Batch #1: 30% water
This batch was with no milk added. All of this water came just from the butter and eggs. I had to knead in the last of the flour at the end, and it was a very crumbly dough. It turned into a fairly dry and crumbly cookie as well. It reminded me of a snickerdoodle when I bit into it. This cookie was fairly chewy, but a bit to dry for optimum chewiness. They did not spread at all, and I had to flatten them manually during the baking.

Batch #2: 50% water
These cookies were a bit easier to work with, being a more moist dough, and reminded me of my mom's cookies (cakey). They were slightly less chewy than batch #1 and had some spread.

Batch #3: 100% water
These cookies had considerable spread. The consistency was very light, soft, and cake-like. They had a very fine and soft grain (little holes inside cakes, muffins, etc).

Batch #4: 50% water + 200% baking powder
I knew what to expect from a higher moisture content that 100% (more cakey texture), and so I decided to try a different variable: baking powder. I honestly expected more of a difference between these and batch #2. These cookies were slightly more airy than batch #2, but that didn't change them much at all.

And so went my day. I still have two very large containers full of cookies that I'm not sure what to do with. But I did learn a very important factor for cookie recipes. Moisture content for dry cookies should hit about 30%, and super soft cookies 50-100%. That puts my perfect chewy cookies somewhere around 40% water content. My series on recipe development for cookies is off to a good start, folks.

Subscribe to get more posts like this!
Share on Tumblr submit to reddit

September 15, 2011

Cinna-muffins with Earl Grey Glaze

In case you haven't seen, I just finished researching, testing, and writing a small guide to recipe development as pertaining to cakes. It was fun and exhausting (not to mention boring to pore over some very dry writing) but I'm glad to be moving on from cakes now. The plan (soon enough) is to look at recipe development and how ingredients work together in cookies, but we'll make a few brief stopovers first. Today I tried the formula for muffins from Ratio by Michael Ruhlman. Overall: I'm fairly impressed. They were a bit more moist than I like my muffins, but it wasn't a bad change of pace.


Ingredients:

  • 8 ounces AP flour
  • 1/2 teaspoon salt
  • 2 teaspoons baking powder
  • 1/2 teaspoon cinnamon
  • 4 ounces brown sugar
  • 4 ounces butter
  • 2 eggs
  • 8 ounces milk
  • 1 teaspoon vanilla
  • 1 teabag of Earl Grey tea
  • ~3 cups powdered sugar

Directions:
  1. First, preheat your oven to 350 degrees F. Line a muffin tin with papers.
  2. Whisk together the dry ingredients.
  3. Melt the butter and mix in the eggs, milk, and vanilla. Whisk until blended.
  4. Combine the wet and dry ingredients, mixing until just combined.
  5. Spoon the batter into muffin tins, filling about half full.
  6. Bake for approximately 16-18 minutes, or until a toothpick comes out clean.
  7. Once the muffins have cooled, pour approximately 1/4 cup of boiling water over the teabag. Let this steep for a few minutes.
  8. Remove the teabag and mix in powdered sugar little by little until the desired glaze consistency is reached (approximately the viscosity of corn syrup).
  9. Dip the muffin tops in the glaze and let harden for a few minutes.
  10. Serve with tea, coffee, or plain.

What's your favorite topping on a muffin? Do you like streusel, glaze, or something else?

Did I mention my eBook? It's for sale in the upper left corner, and I'm also giving a couple of copies away to people who join the site via Google Friend Connect!
Share on Tumblr submit to reddit

September 14, 2011

Cocoa Powder and Cupcakes

Normally I'm not one to be affected much by the richness of a dessert. The notable exception is peanut butter and chocolate desserts. Something about the combination of flavors, honestly, takes me to a dark place. It probably stems back to a misspent childhood of gorging myself of Reese's Pieces (also the reason circus peanuts changed overnight from my favorite to most revolting candy). These cupcakes were an effort to overcome these feelings and to do another test run of my new layer cake guidelines. Spoiler alert: success!

I'm also super excited to announce my new short ebook! It's a great little guide for creating a cake recipe that goes far above and beyond what's found on the site already. Cakery is 90% new content, and the content which is from the blog had been retooled and adjusted, in light of some research and experiments I've done since then. So if you liked the recipe development posts and want to take your cakes to the next level, there's a button in the upper left-hand corner that'll take you through a quick and easy Google Checkout so you can get the book within minutes. Did I mention it's only $5?

I'm also giving away a couple of free copies! All you have to do to win one is follow me with Google Friend Connect (the gadget is at the bottom of the page). So click the little join button (you won't get any spam, just a feed of my blog posts) and in a couple of days, I'll send the winners an email. Good luck!


A note on cocoa powder: I wanted a very chocolatey cake, bordering on bitter, and I got it. I recommend, then, not using cocoa powder for any more than 1/3 of your driers.

Ingredients:

  • 4 ounces AP flour
  • 2 ounces cocoa powder
  • 1/4 teaspoon salt
  • 1 teaspoon baking powder
  • 3.6 ounces butter, softened
  • 3 ounces sugar
  • 1 egg
  • 4.2 ounces milk
  • 1/2 teaspoon vanilla
  • 4 ounces butter, softened
  • 1/4 cup peanut butter
  • 2 cups powdered sugar
Directions:
  1. First, preheat the oven to about 360 degrees F. Line cupcake tins with papers and set aside.
  2. Whisk together the flour, cocoa powder, salt, and baking powder. Set aside.
  3. In a stand mixer, beat together the butter and sugar until light and fluffy.
  4. Add in the egg and beat until combined.
  5. Alternate in the driers and the milk and vanilla until all are combined.
  6. Scoop the batter into the cupcake papers, filling about half full.
  7. Bake for 15-20 minutes, until a toothpick comes out clean.
  8. Once the cupcakes have cooled, beat together the 4 oz butter, the peanut butter, and the powdered sugar until light and fluffy. Ice the cupcakes.
What childhood candies set your stomach churning?

For more content on recipes and recipe development, subscribe.
Share on Tumblr submit to reddit

September 11, 2011

Summer in September (with Blackberry Chocolate Roulade recipe)

Today, September 11th, 2011, it is 85 degrees outside. In Washington. Here in the evergreen state, we panic when heat sets in. Every year when the temperature gauge hits seventy-five we flock to home improvement stores to wipe clean their stock of fans. And then we hunker down, six fans pointed straight at each of us, lathered in an inch-thick layer of sunscreen to protect our fair skin, and wait for September.

Our plants are just as heat-sensitive as we are
September is the magical time of year when the clouds and rain return, and we can all come out of our sun-induced hibernation and return to our lives. Or at least it's supposed to be. This time of year, frozen blackberries bide their time to shine, when the first holiday pie is dreamed of. But not this year.

I find it handy to have all of the ingredients measured and ready to go
Eggs and sugar get a nice foam going
So I find myself making this cake by way of grudging acknowledgement that summer has not left. All I can do now is pray for a better October.

The batter with all of the ingredients should be light, but fairly viscous
Ingredients:
  • 4 ounces AP flour
  • 2 ounces cocoa powder
  • 1/2 teaspoon salt
  • 7 ounces eggs
  • 5 ounces white sugar
  • 3 ounces brown sugar
  • 4 ounces milk
  • 1 teaspoon vanilla extract
  • 16 ounces heavy cream
  • 4 ounces sugar
  • 6 ounces blackberries
A flat cake like this bakes very fast, so be sure to keep an eye on it
Directions:
  1. Preheat your oven to 350 degrees F. Whisk together the flour, cocoa powder, and salt. Line a half sheet pan with parchment paper and nonstick spray.
  2. Using the whip attachment on your stand mixer (or a whisk) whisk together the eggs and sugars until very light (about 4 minutes).
  3. Stir a portion of the dry mixtures, followed by the vanilla and a portion of the milk into the batter, alternating until all of the ingredients are combined.
  4. Spread the batter onto your prepared half sheet pan and bake for approximately 8-10 minutes, or until a toothpick comes out clean.
  5. Cool the cake until completely cool (about 30 minutes).
  6. Once the cake has cooled, begin to whip the heavy cream, sprinkling in the sugar a little at a time until it is all combined. Whip this until it forms stiff peaks.
  7. Spread the heavy cream over your sheet of cake. Then sprinkles the berries over the cream.
  8. Carefully roll the cake, starting with the thin side.
  9. Dust the finished roll with powdered sugar and keep refrigerated.


For more on how to develop your own sponge cake recipe, click here.
If you want more content like this, be sure to subscribe.

Share on Tumblr submit to reddit

September 10, 2011

Caramel Sauce 101

When I first started baking, I made the classic rookie mistake of "winging it." For those of you unfamiliar, 'winging it' is the act of baking without any sort of recipe or ratio, and is usually the result of laziness. My first experience with its disastrous consequences came about after I decided that I knew the ingredients in caramel sauce, and thus could make it without any guides. After covering my delicately prepared dessert in rock-hard amber liquid instead of the gooey, creamy sauce I had envisioned, I hung my head in shame.

Since that fateful day, I've always doggedly followed recipes for caramel. As should you. But wouldn't it be better to know the proportions (as we do for ganache) for each type of caramel? I think so. So I put together a little test using heavy cream, milk, yogurt, water, and butter as additions to the initial sugar. And I made sure to write them careful down, so as to share them with you lovely people.

All ratios assume that the weight of sugar used equals 100%. To make the caramel sauce, I cooked sugar with a splash of water and cream of tartar in a saucepan until they reached an amber color, then whisked in the test ingredient.

Test Caramels:
  • Caramel #1 - 50% water: This caramel was bland and not at all creamy. It kept its shape fairly well (only minimal spreading at first) and didn't harden. For this reason, I chose not to test with a higher than 50% water content.
  • Caramel #2 - 50% milk: This caramel was not creamy either, but contained burnt milk solids. It wasn't as bland as Caramel #1 and spread was roughly the same.
  • Caramel #3 - 50% heavy cream: This caramel was fairly creamy, thick, and stayed fairly soft. It was gooey, and stuck to a spoon even upside down.
  • Caramel #4 - 50% butter: The butter melted but would not mix fully into this caramel. The result was a very hard sugar with a thick layer of grease on top.
  • Caramel #5 - 100% cream: This caramel was smooth and creamy, but stayed very soft and was not at all gooey.
  • Caramel #6 - 50% yogurt: This caramel had lots of burnt milk solids, was grainy, slightly gooey, and had an odd, sour taste.
  • Caramel #7 - 20% butter: This caramel was just as hard as #4, but without excess butter sitting on top.
  • Caramel #8 - 30% cream: This caramel was hard, though not quite as hard as #4 or #7.
Conclusion:

Caramel #4, made with 50% heavy cream, was by far the best sauce of the group and heavy cream was the only additional ingredient which really worked. The caramel with 30% heavy cream ended up too hard, and the caramel with 100% heavy cream was very soft and runny. For a thick, gooey caramel, 40-50% is as little heavy cream as you should use. That will produce a nice thick and gooey caramel which will probably be fairly sticky. As you climb the scale toward 100%, a progressively thinner and runnier caramel will form. Over 100%, the caramel would be close to water in viscosity. This tells me that caramel needs both enough fat and water to create both softness and creamy-ness without burning or excluding the fat.

I hope everyone else found this experiment as beneficial as I did. Enjoy your caramel making, everyone!

If you liked this post, leave me a comment and let me know! And don't forget to subscribe for more just like it.
Share on Tumblr submit to reddit

September 7, 2011

Cheesecake Brownies

I've been making quite a few cheesecake things lately. And quite a few brownie things. And so, I come to the massive climax of these two trends: cheesecake brownies. For this recipe, I didn't want anything too fancy. I just wanted a good, quality cheesecake and a good, quality, chocolate-y brownie. And I got them. The cheesecake is has a rich taste and simple vanilla flavor, without being too heavy, and the brownies are perfectly gooey and chocolate-y.


I decided to use a brownie recipe I already had, because I knew it was the texture I wanted. So I created a little cheesecake mix-in recipe to go with it.


Ingredients:

  • 8 oz cream cheese, softened
  • 1/2 cup sugar
  • 1 1/2 tsp vanilla extract
  • 2 tbsp flour
  • 1/2 tsp salt
  • 1 egg
  • One batch of brownie batter
Directions:
  1. First, preheat your oven to 350 degrees F.
  2. Next, beat together the cream cheese, sugar, and vanilla until thoroughly combined.
  3. Then add in the flour and the salt and beat until just mixed.
  4. Beat in the egg.
  5. Pour about half of the brownie batter into a baking dish, then add the cheesecake before topping with the rest of the brownie batter.
  6. Using a butter knife, swirl together the batters, taking care not to mix them into a homogeneous batter.
  7. Bake for about 30 minutes, or until a toothpick comes out clean.
These were moist and delicious, and I'd make them again in a heartbeat.


What desserts are you looking forward to as we head into fall? Any you've always wanted to know about, that you'd like to see on Confectious?
Share on Tumblr submit to reddit

September 4, 2011

Caramel Apple Pretzels

That's right. Caramel Apple + Pretzels. All this recipe took was a trusty pretzel recipe from Alton Brown, some apples, and a drizzle of hot caramel and perfection was achieved. They were sweet, salty, and delicious. Caramel apple fever is here, folks. Be prepared.


Pretzel recipe adapted from Alton Brown.
Ingredients:
  • 4 1/2 cups flour
  • 2 tsp instant yeast
  • 2 tsp salt
  • 2 tsp sugar
  • 1 1/2 cups water
  • 6 tbsp butter
  • 2 granny smith apples, diced
  • 2/3 cup baking soda
  • 1 cup sugar
  • 1/3 cup water
  • 1/4 cup heavy cream
  • 1 tbsp butter
Directions:
  1. First, combine the flour, yeast, salt, and sugar in the bowl of a stand mixer with dough hook attachment and mix to combine.
  2. Next, add the water and butter before kneading approximately 7 minutes, or until the dough is smooth and not sticky.
  3. Add the apples to the dough and knead just until incorporated.
  4. Transfer the dough to an oiled bowl and cover. Allow it to rise for about an hour.
  5. Cut the dough into 12 equal portion, roll into a long rope, and shape into pretzels (or cut into pretzel bites).
  6. Preheat the oven to 450 F and place the shaped pretzels onto parchment lined sheet pans and cover while you bring 2/3 cup baking soda and 10 cups of water to boil in a large pot.
  7. Boil the pretzels for approximately 30 seconds each and place them back on the parchment paper.
  8. Brush the tops with egg wash, heavy cream, or water, and sprinkle a small amount of salt onto each pretzel.
  9. Bake for about 8 minutes, or until the pretzels are nice and golden.
  10. While the pretzels cool, add 1/3 cup water and 1 cup sugar to an oiled saucepan over medium heat, stirring until the sugar dissolves. Cook the sugar until it becomes a dark amber in color, then remove from heat.
  11. Promptly stir in the heavy cream and butter. Allow the caramel to cool for a few minutes.
  12. Drizzle the caramel over the pretzels once you think it's cool enough not to burn your mouth (or more likely until you can't wait any longer) and enjoy.
A few simple additions turn pretzels from awesome salty snack to perfectly balanced and fun dessert.


What's your favorite fair food? The most outrageous you've come across?
Share on Tumblr submit to reddit

September 3, 2011

Caramel Monkey Bread

I've been promising the fiancee monkey bread for quite a while now. Except both of us kept forgetting. Somehow monkey bread or monkeys would come up and we'd both go "Oh yeah." And then promptly forget again. This time, I actually made it though. Probably just because I was on a bit of a bread kick, but no one's complaining.


The dough recipe comes from one of my favorite cook books, The Bread Baker's Apprentice: Mastering the Art of Extraordinary Bread.

Ingredients:
  • 3.25 oz sugar
  • 1 tsp salt
  • 2.75 oz butter
  • 1 egg
  • 1 teaspoon lemon extract
  • 16 oz bread or AP flour
  • 2 tsp instant yeast
  • 9 oz milk
  • 1 1/2 cup brown sugar
  • 2/3 cup heavy cream
  • 2/3 cup brown sugar
  • 1 tsp cinnamon
Directions:
  1. Cream together the butter, sugar, and salt. Once smooth, beat in the egg and lemon until smooth.
  2. Add the flour, yeast, and milk, and knead until the dough passes the windowpane test.
  3. Ferment for 2 hours.
  4. Mix together 1 1/2 cups brown sugar and 2/3 cup heavy cream until smooth. Pour half of this mixture into the bottom of a bundt pan.
  5. Cut the dough into small bites, about the size of a golf ball.
  6. Mix together 2/3 cup brown sugar and 1 tsp cinnamon. Roll each ball in mixture.
  7. Place the balls into the pan, not packing too tightly.
  8. Pour the rest of the caramel mixture over the dough and allow to proof at room temperature until doubled in size.
  9. Preheat the oven to 350 degrees.
  10. Bake for about 20 minutes, until the bread is golden brown.

I promise I'll have more stuff on recipe development and the good 'ol Confectious you're all used to soon. In fact, I'm working on something really big right now! So stay tuned.
Share on Tumblr submit to reddit